
How to easily save to SharePoint from Word, Excel, and PowerPoint


Now, I should mention, if you did not realize this already, that this solution only works for those who are in SharePoint Online (Office 365). If you are in SharePoint on-premises, you will need to rely on the other six options.

How to Save As from Word, Excel, and PowerPoint to SharePoint

Here are the steps, the user experience is pretty smooth now, just like a glass of good tequila on a Friday afternoon (which is when I am writing this post).

Step 1. Add A Place (SharePoint)

This step might or might not be necessary, depending on whether or not you already added SharePoint as a favorite place (shortcut) from within MS Office. If you see Sites section when you do Save As from Word, Excel or PowerPoint (like shown in the image), then you can skip to Step 2. If not, follow the steps below.

  1. From either Word, Excel or PowerPoint (you only need to do this on one of the apps, not all), click on File > Save As > Add a Place
  2. On the next screen, choose Office 365 SharePoint
  3. On the pop-up, enter your Office 365 User ID (work email), click Next
  4. Enter Password, then click Sign In
  5. Bingo! Your OneDrive shortcut + SharePoint shortcut will be added to the menu
NOTE 1: As stated above, you only need to do the above steps once in one of the apps (i.e., MS Word). Once completed, same favorites will show up in Excel and PowerPoint!
NOTE 2: It will add both, SharePoint + OneDrive for Business. This means you will be able to save files to either SharePoint sites or personal OneDrive space.

Step 2. Save As from MS Office

Now the most exciting part.
  1. Go to Word, Excel or PowerPoint, and create a new document or open an existing one
  2. Click Save As, choose Sites
  3. Form the long list of sites you visit frequently or follow, choose the one you want to save to
  4. From the next screen, choose the document library you want to save to. In case you have created many libraries on a site, they will all appear here. Pick one.
  5. Next, pick the folder within a library – drill down as necessary
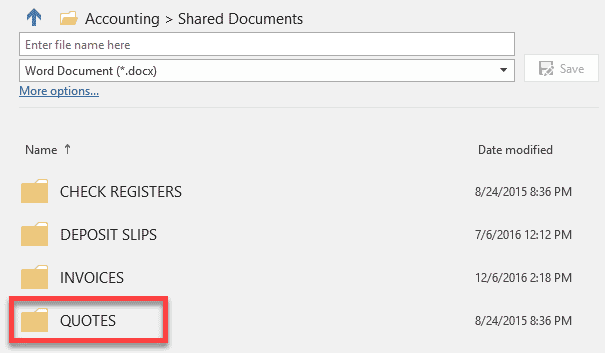
  6. Provide or change a file name if necessary, then click Save
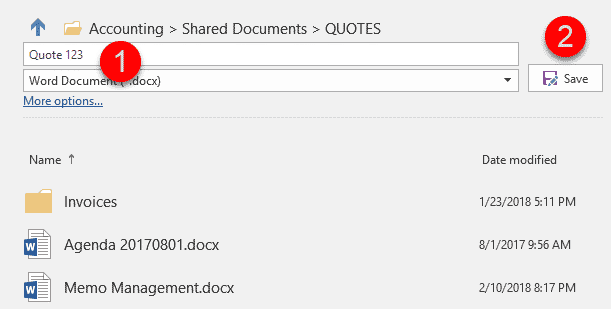
  7. This is it; we did it – we saved the file to SharePoint! As promised, it was nice and smooth

Comments

Popular posts from this blog

SharePoint Framework (SPFx).

What is SharePoint Framework   Client Side SharePoint Development using SharePoint Framework (SPFx). The SharePoint Framework (SPFx) development is a great milestone for SharePoint Client Side development. It is a page and web part model. This provides full support for client-side SharePoint development. It allows to easily integrate component with SharePoint data and supports for open source tooling. With SharePoint Framework, you can use any of your preferred web technologies and tools in your preferred development environment. It is to build responsive and mobile friendly SharePoint products and apps. SharePoint Framework (SPFx)   helps to build custom user interface extensions on top of SharePoint Online in supportive and future prepared way as SharePoint Online keeps itself updated time to time. Create new web part project You need to perform following steps:   1.       Create new project directory at your opted loca...

3 ways to filter SharePoint lists and libraries

One of the greatest benefits of metadata is the ability to filter on it and get to what you want with just a few clicks. Filtering for information is quite a common exercise these days. Every time we do online shopping, we filter for stuff. When we shop on Amazon® for shoes (something I do every day 🙂 ), we filter on cost, shoe size, reviews, brand among other things. When you go to a bookstore website, you filter for author and genre. When you research your dream car – you filter on car type, fuel economy, color. In SharePoint, we have not one, but three ways to filter SharePoint metadata! Today I would like to describe and explain all the three options to you. Option 1: Column header filter This is the most basic option that has been available ever since custom columns became available in SharePoint. Essentially this is the filtering you do using column headers. The functionality might be well familiar to many users as this is something we can do in Excel as well. ...

PowerApps

PowerApps is part of Office 365 and allows users to create business applications a couple of hours. This article shows you how to start learning the basics of PowerApps. Where do I develop a PowerApp? PowerApps development is done in PowerApps Studio, which is a downloadable client application or directly inside your browser. Start with a template … My recommendation, if you’re just starting, is to create your first PowerApp from one of the templates included in the product.   At the moment do not worry about how the PowerApp looks like. Just click on the “create” button and pick a template to use in your business environment. Branding and building for mobile devices Some applications in the templates section have multiple design modes. In the example of the Estimator Pro PowerApp, there are two design modes; the phone factor and tablet factor. A phone factor does not mean your PowerApp cannot be displayed on a PC or tablet; it means it will work ...